
Table of Contents
فوائد الترقية إلى مضخة وقود مقاس 8 مم لزيادة القدرة الحصانية في محركات سوزوكي الخارجية
بشكل عام، تعد الترقية إلى مضخة وقود مقاس 8 مم لمحرك سوزوكي الخارجي بقوة 300 حصان و1000 دورة في الدقيقة قرارًا حكيمًا يمكن أن يؤدي إلى فوائد كبيرة من حيث زيادة القدرة الحصانية، وتحسين كفاءة استهلاك الوقود، وتعزيز المتانة. من خلال الاستثمار في هذا المكون الأساسي، يمكنك إطلاق العنان للإمكانات الكاملة لمحركك والاستمتاع بتجربة ركوب قوارب أكثر إثارة وموثوقية. فلماذا الانتظار؟ قم بالترقية إلى مضخة وقود مقاس 8 مم اليوم وانتقل بمحرك سوزوكي الخارجي إلى المستوى التالي.
دليل خطوة بخطوة حول استبدال مجموعة خط الوقود (الجزء 665770-90J11) في محركات سوزوكي الخارجية
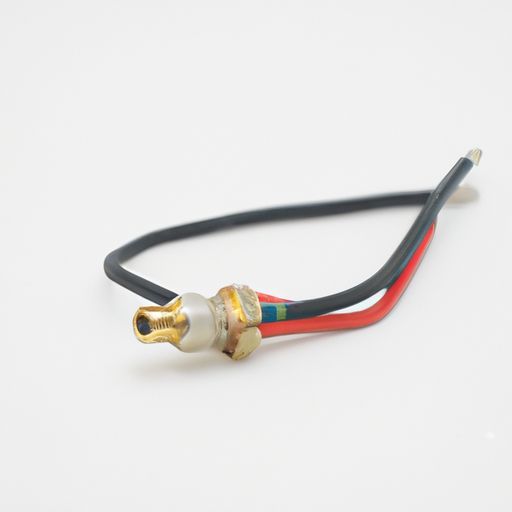
إذا كنت تمتلك محرك سوزوكي خارجي بقدرة 300 حصان و1000 دورة في الدقيقة، فقد تجد نفسك بحاجة إلى استبدال مجموعة خط الوقود في مرحلة ما. تعد مجموعة خط الوقود، الجزء رقم 665770-90J11، مكونًا حاسمًا يضمن التدفق المناسب للوقود من الخزان إلى المحرك. في هذه المقالة، سنزودك بدليل خطوة بخطوة حول كيفية استبدال مجموعة خط الوقود في محرك سوزوكي الخارجي الخاص بك.
قبل أن تبدأ عملية الاستبدال، من المهم جمع كل الأدوات والمواد اللازمة . ستحتاج إلى مجموعة من مفاتيح الربط، ومفك براغي، وزوج من الكماشات، ومجموعة جديدة من خط الوقود (رقم الجزء 665770-90J11). تأكد من العمل في منطقة جيدة التهوية واحتفظ بمطفأة حريق في متناول اليد في حالات الطوارئ.
الخطوة الأولى في استبدال مجموعة خط الوقود هي تحديد موقع خط الوقود الموجود في محرك سوزوكي الخارجي الخاص بك. يقع خط الوقود عادة بالقرب من خزان الوقود ويمتد على طول جانب المحرك. افحص خط الوقود بعناية بحثًا عن أي علامات تلف أو تآكل، مثل الشقوق أو التسريبات. إذا لاحظت أي ضرر، فمن المهم استبدال مجموعة خط الوقود في أسرع وقت ممكن لمنع أي تسرب محتمل للوقود.
بمجرد تحديد موقع خط الوقود، فإن الخطوة التالية هي فصله عن المحرك. استخدم مفتاح ربط لفك التركيبات التي تربط خط الوقود بالمحرك. تأكد من وضع قطعة قماش أسفل التركيبات لالتقاط أي وقود قد ينسكب أثناء عملية قطع الاتصال. بمجرد فك التركيبات، قم بإزالة خط الوقود بعناية من المحرك وضعه جانبًا.
مع إزالة خط الوقود القديم، حان الوقت لتثبيت مجموعة خط الوقود الجديد. خذ مجموعة خط الوقود الجديد (رقم الجزء 665770-90J11) وقم بتوصيلها بعناية بالمحرك باستخدام التركيبات. تأكد من ربط التركيبات بشكل آمن لمنع أي تسرب للوقود. بمجرد تثبيت مجموعة خط الوقود الجديد في مكانها بشكل آمن، تحقق مرة أخرى من جميع التوصيلات للتأكد من أنها محكمة وآمنة.
بعد تثبيت مجموعة خط الوقود الجديد، من المهم اختبار المحرك للتأكد من تدفق الوقود بشكل صحيح. قم بتشغيل المحرك واتركه يعمل لبضع دقائق للسماح للوقود بالتدفق عبر مجموعة خط الوقود الجديد. تحقق من وجود أي تسرب أو خلل في تدفق الوقود. إذا كان كل شيء يبدو جيدًا، فقد نجحت في استبدال مجموعة خط الوقود في محرك سوزوكي الخارجي.
في الختام، يعد استبدال مجموعة خط الوقود في محرك سوزوكي الخارجي عملية مباشرة يمكن إكمالها باستخدام الأدوات والمواد المناسبة. باتباع الدليل التفصيلي الموضح في هذه المقالة، يمكنك التأكد من استمرار عمل المحرك بسلاسة وكفاءة. تذكر دائمًا إعطاء الأولوية للسلامة عند العمل على المحرك الخاص بك واستشارة أحد المتخصصين إذا لم تكن متأكدًا من أي جانب من جوانب عملية الاستبدال.
If you own a Suzuki outboard engine with a 300hp capacity and 1000rpm, you may find yourself in need of replacing the fuel line assembly at some point. The fuel line assembly, part number 665770-90J11, is a crucial component that ensures the proper flow of fuel from the tank to the engine. In this article, we will provide you with a step-by-step guide on how to replace the fuel line assembly in your Suzuki outboard engine.
Before you begin the replacement process, it is important to gather all the necessary tools and materials. You will need a set of wrenches, a Screwdriver, a pair of pliers, and a new fuel line assembly (part number 665770-90J11). Make sure to work in a well-ventilated area and have a fire extinguisher on hand in case of emergencies.
The first step in replacing the fuel line assembly is to locate the existing fuel line on your Suzuki outboard engine. The fuel line is typically located near the fuel tank and runs along the side of the engine. Carefully inspect the fuel line for any signs of damage or wear, such as cracks or leaks. If you notice any damage, it is important to replace the fuel line assembly as soon as possible to prevent any potential fuel leaks.
Once you have located the fuel line, the next step is to disconnect it from the engine. Use a Wrench to loosen the fittings that connect the fuel line to the engine. Be sure to place a rag underneath the fittings to catch any fuel that may spill out during the disconnection process. Once the fittings are loosened, carefully remove the fuel line from the engine and set it aside.
With the old fuel line removed, it is time to install the new fuel line assembly. Take the new fuel line assembly (part number 665770-90J11) and carefully connect it to the engine using the fittings. Make sure to tighten the fittings securely to prevent any fuel leaks. Once the new fuel line assembly is securely in place, double-check all connections to ensure they are tight and secure.
After installing the new fuel line assembly, it is important to test the engine to ensure that the fuel is flowing properly. Start the engine and let it run for a few minutes to allow the fuel to flow through the new fuel line assembly. Check for any leaks or abnormalities in the fuel flow. If everything looks good, you have successfully replaced the fuel line assembly in your Suzuki outboard engine.
In conclusion, replacing the fuel line assembly in your Suzuki outboard engine is a straightforward process that can be completed with the right tools and materials. By following the step-by-step guide outlined in this article, you can ensure that your engine continues to run smoothly and efficiently. Remember to always prioritize Safety when working on your engine and consult a professional if you are unsure about any aspect of the replacement process.
